"I got the wire i needed at Lowe's... its 14 gauge galvanized wire (it was under $5 for 100feet and i still have left overs after making 9 hangers)
you will also need:
cutting pliers
needle nose pliers
ribbon (i tied cute bows on the top of mine)
you can get those at any craft supply store, they have the pliers for jewelry making and of course they have cute ribbons!!
a premade wire hanger
paper and pen
As for measuring the wire, for a short name like 4 letters I went with 60 inches and added 10-12 inches for each additional letter in the name (a hanger for gina would be 60 inches, one for rosie would be 70-72.. and so on) that will be more than enough.
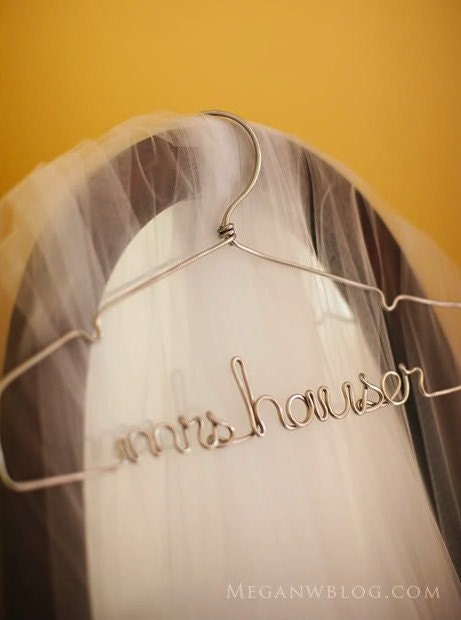
I used the pre-made wire hanger (like the ones from the dry cleaners) as my template but added the little notches for the dress straps to fall (to make those I used the needle nose pliers to bend the wire down and then back up again in a "u" shape. I basically laid the wire on top of the premade hanger and bent along the curve of it... mostly using my hands.
As for the letters, I printed out some pictures from etsy to see how the letters were made, and I drew out the name exactly how it would be done on the hanger. the pictures from etsy helped alot with some more difficult letters. Just remember all letters have to be continuous. I used the pliers a lot for this part and also a C or D battery to make the circles in the "o's" and "d's" and other letters with circles in them. When you are making it you will see that making the name is not as hard as it looks.
After i finished the name I laid the hanger back on top of the premade one and followed the curve back up to the top and made a notch for the strap the same way I did the first one.
I then brought the wire around the hook part (the part that hangs on the rod in the closet, I don't know what to call it) and twisted tightly using my needle nose pliers. cut off any excess and tied a cute little bow around it and then just played around with it to make sure all the letters were in place and voila!"
3 comments:
Holy moly! That's quite the task you're taking on. I don't think I'd be able to pull that off but I love those hangers. Thanks for sharing!
Oh wow those look amazing!!!
those are neat neat neat... but not something i would be able to do- I dont think... great share.
I am major fan of DIY stuff... check out my wedding blog for our upcoming Destination wedding in Cabo... our invites are uniqie and 100% DIY... peek at the blog, follow too :) and find the invite post- you'll like them if you are a DIY/Beach girl!
www.aandaasonnek.blogspot.comlet me know what you think! :)
Thanks for blogging!
A
www.andreajo-anderaknows.blogspot.com
Post a Comment